A mechanical keyboard is highly favored among gamers and typists alike, as it offers tactile feedback and a satisfying keystroke sound. Membrane keyboards, on the other hand, are a common and more affordable option, but often lack the tactile response of mechanical keyboards. However, it is possible to convert a membrane keyboard to a mechanical keyboard with a bit of effort and some technical know-how.
How to Transform Membrane Keyboard Into A Mechanical Keyboard
Before we get started, it’s important to note that not all membrane keyboards are convertible to mechanical ones. Some membrane keyboards have a completely different layout and design that makes conversion impossible. Additionally, the conversion process may not be worth the time, effort, and expense if the membrane keyboard is old, damaged, or not of high quality.
Assuming you have a membrane keyboard that can be converted, here’s how you can go about it:
Step 1: Disassemble the keyboard
The first step is to carefully take apart the membrane keyboard. This involves removing the keycaps and the housing. To do this, start by prying off the keycaps with a keycap puller or a small screwdriver. Be gentle to avoid breaking the keycaps or damaging the switch underneath.
Next, remove the screws from the back of the keyboard and carefully pry open the housing using a flathead screwdriver. Be careful not to damage the plastic clips that hold the housing together. Once you have access to the circuit board, remove it from the housing.
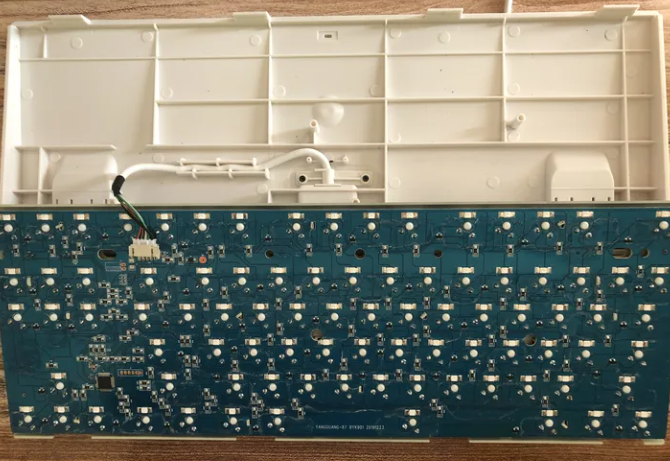
Step 2: Prepare the circuit board
Now that you have the circuit board removed, you need to prepare it for the mechanical switches. This involves desoldering the membrane switches and cleaning up the solder pads. You will need a soldering iron, a desoldering pump, and some solder wick for this step.
Start by heating up the solder on each switch and using the desoldering pump to remove the excess solder. Use the solder wick to clean up any remaining solder from the pads. Repeat this process for each switch until you have removed them all.
Step 3: Install the mechanical switches
With the circuit board prepared, it’s time to install the mechanical switches. You will need to purchase the mechanical switches of your choice, such as Cherry MX, Gateron, or Kailh switches, and a soldering iron.
Begin by inserting the switches into the PCB and ensuring that they are aligned properly. Once you have all the switches in place, solder them onto the pads. Be careful not to use too much solder or create any solder bridges, as this can cause the keyboard to malfunction.
Step 4: Reassemble the keyboard
With the switches installed, it’s time to put the keyboard back together. Begin by reattaching the circuit board to the housing and screwing it back in place. Then, reattach the keycaps to the switches.
Step 5: Test the keyboard
Now that the keyboard is reassembled, it’s time to test it out. Connect the keyboard to your computer and try typing on it to see if it’s working properly. If you encounter any issues, check your soldering and make sure the switches are aligned correctly.
That’s all about turn membrane keyboard into a mechanical one. Converting a membrane keyboard to a mechanical keyboard requires some technical know-how, but it is a rewarding and cost-effective way to upgrade your keyboard. However, it’s important to note that not all membrane keyboards are convertible to mechanical ones. Some membrane keyboards have a completely different layout and design that makes conversion impossible. Additionally, the conversion process may not be worth the time, effort, and expense if the membrane keyboard is old, damaged, or not of high quality.